ChurchSuite Plan Viewer
A simple tool to view and print service plans in ChurchSuite
View the Project on GitHub hussra/churchsuite-plan-viewer
Installation and Setup
This guide will help you set up and configure the ChurchSuite Plan Viewer application.
Setting up access
Before you can use ChurchSuite Plan Viewer, you will need to set up a user account in ChurchSuite and grant “API access”. To do this, first log into ChurchSuite as a user with administator privileges, click on your profile top right, and go to Settings, then Users.
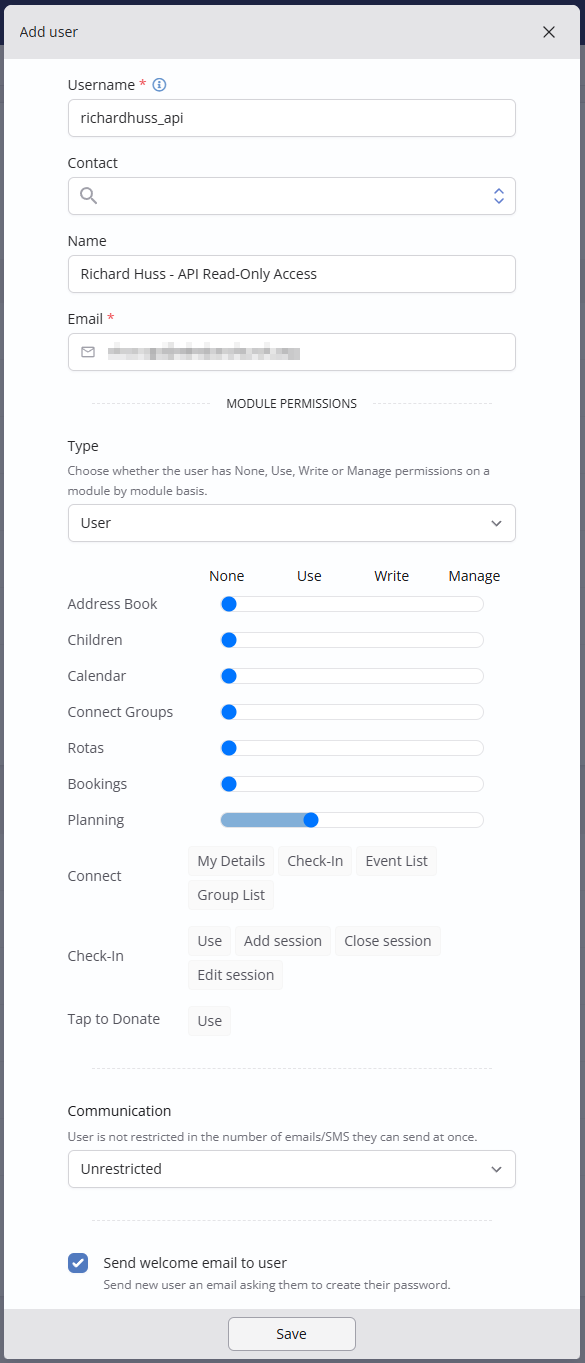
Click Add User and set up the new user account. I recommend you use the same username as your regular account, with _api
added at the end. Give user a name that clearly indicates its purpose. Under Module Permissions, give Use access
to the Planning module - no other permissions are required.
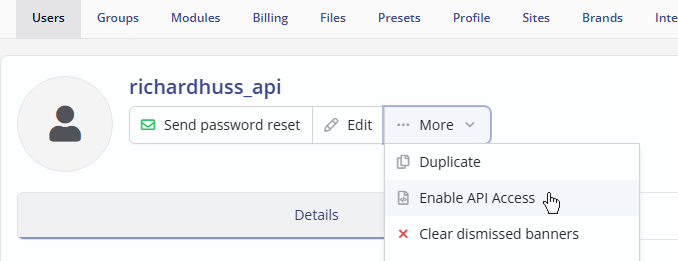
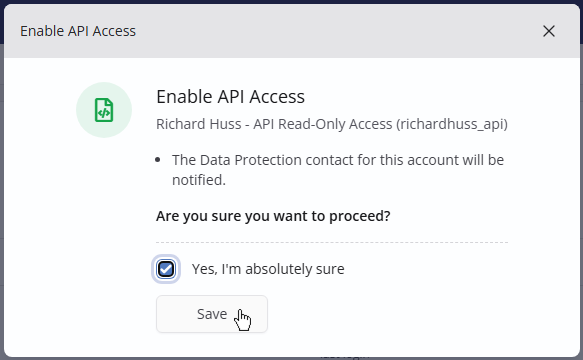
Once you have saved the new user, click … More and choose Enable API Access.
Now log out, and log in as your newly created user.
Click on your profile top right, and choose My profile.

Click into the Secrets tab which will now be visible, and click Add secret.
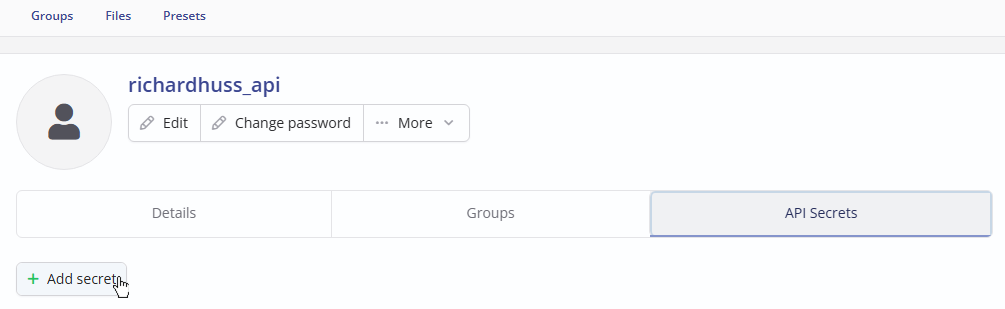
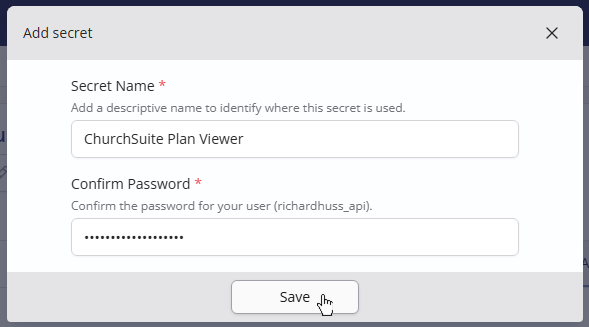
Enter a name (I used ChurchSuite Plan Viewer) and confirm your password.
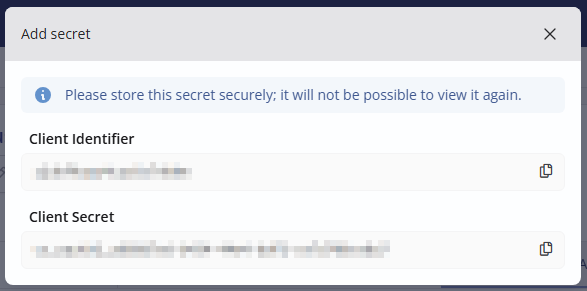
Your new API secret will be shown - it will not be possible to view it again once you have closed the dialog. Easiest to keep it on the screen until you have installed and run the program.
Installing the program
Now you can download and install ChurchSuite Plan Viewer from the releases page.
When it first runs, it will show the Authentication Settings section, asking for a Client Identifier and Client Secret. Enter the Client Identifier and Client Secret you got from ChurchSuite above.
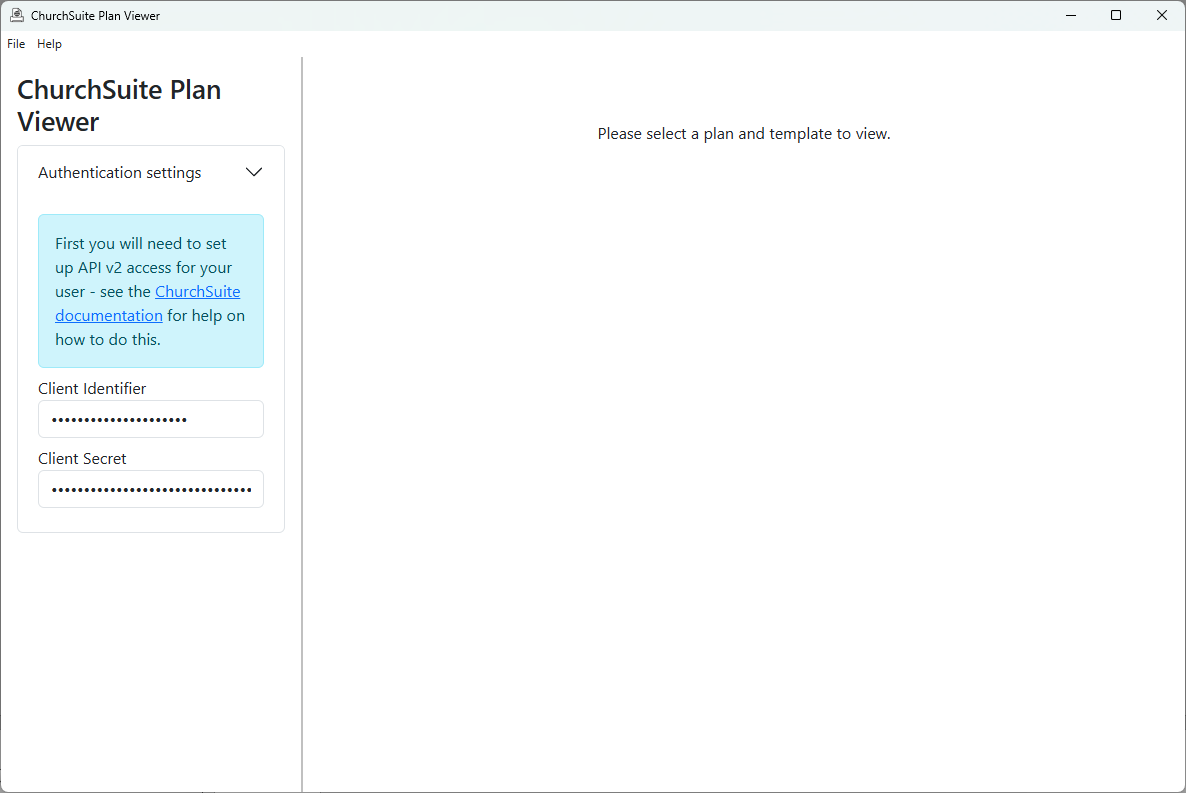
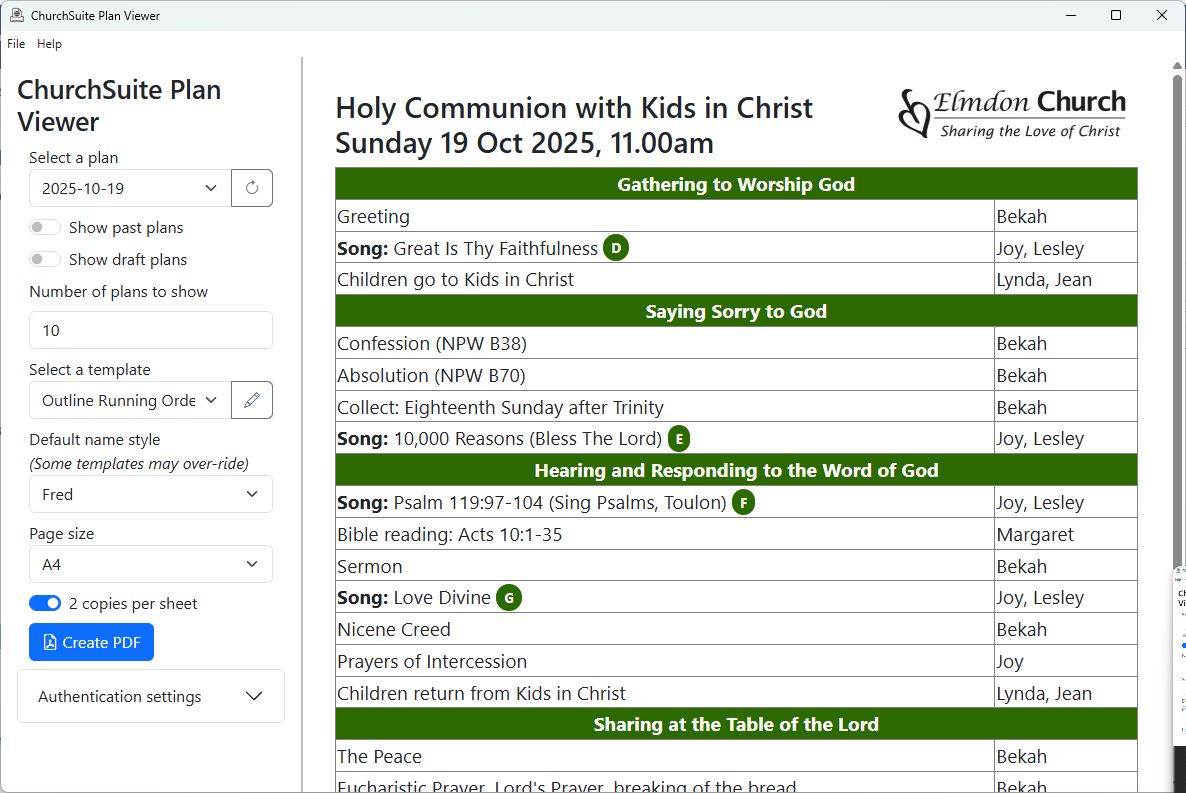
Once successfully connected, the Authentication Settings section will be hidden and you will see on the left a panel allowing you to select a plan, template and other settings, and on the right a preview of the selected plan.